
At last: I'm hoping I got this right!
Some history: the FT817 is great for operation with a PC and laptop, but does need an interface. You'll find the mark 1 version of my interface on this website. It was a straightforward CAT interface with a USB-to-serial adapter plugged into the back; and it provided a simple transformer coupled audio interface for AFSK, with jack plugs to go to the laptop microphone and speaker connections. This worked OK, but when we got the FT450 we decided some improvements would be needed. We used an internal USB hub, two USB-to-serial ports and USB audio "stick". The new interface allowed the PTT and the CAT data connection to be on separate COM ports, which is good if they are operated by different PC programs (e.g. Ham Radio Deluxe for CAT and Digital Master 780 for PTT). We also added front panel level controls. A better interface, but far too large.
Recently, I wanted to try WSPR. Unfortunately, my new laptop only has a single headphone/microphone socket. No problem - I had a plug-in USB audio dongle. with a couple of USB leads, I was able to get the FT817 interface running; but then I fell foul of its PTT line and CAT port being the same COM port. It was time for some redesign.
Things I wanted to achieve:
- USB hub, COM and audio interfaces in the box
- Front panel level controls
- Two COM ports to separate CAT and PTT
- Properly powered (i.e. not by a COM port line)
- Electrical isolation, as per the previous version
- .... and it should be the same box as the original interface.
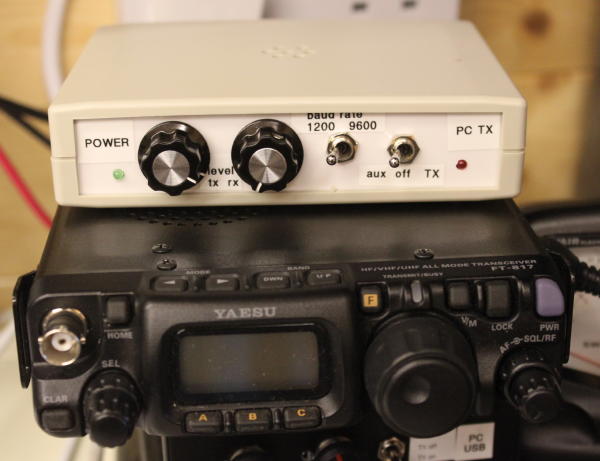
The last requirement was the biggest challenge: the old FT817 interface is about one third of the volume of the FT450 interface, that had the right features. But the interface has got to fit in with what is a small radio, or it just looks daft. Eventually I realised that if I took the USB hub and audio dongles out of their plastic boxes, they's fit ino the top half of the interface box. I also had two USB serial port leads with the USB interface in the USB plug, and then TTL level signals into the cable. Game on.
The electrical design is very much as per the original interface. Simple transformer coupling for audio, this time with front panel level controls. An optoisolator provides electrical isolation for the COM ports. This design only operates up to 9600 baud and won't work at 38400 baud: the risetime is too low.The main difference from the original is that the interface needs to provide straight through buffering rather than acting as an inverter: remember there's no TTL-to-RS232 level converters in the serial port, and those normally invert the signals. One of my USB-to-serial adapters had 3.3v logic levels: I've used two diodes as a "dropper" to make sure that a logic 1 does properly cut off the LEDs in the opto isolator.
The interface is constructed on veroboard. The positioning of the components (and particularly the transformers) was awkward because of the USB interface in the lid, but worked out OK. There's actually a reasonable amount of spare space available. The TX monitor uses a small piezo speaker: the amplifier is VERY non linear so don't expect sensible audio for anything except single tone signals (e.g. PSK31): it's only there to let you know it is generating a signal!
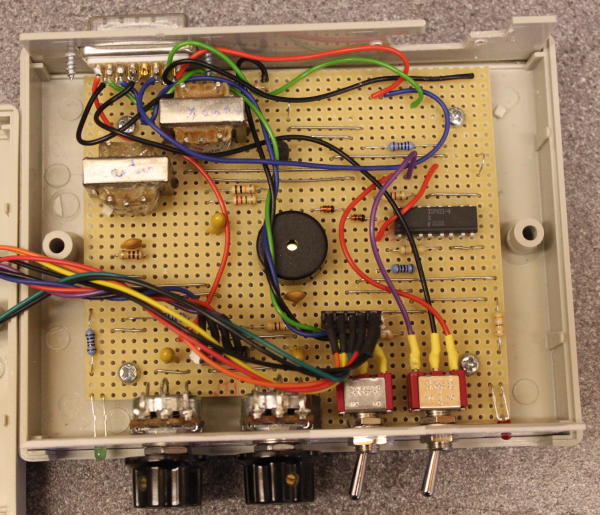
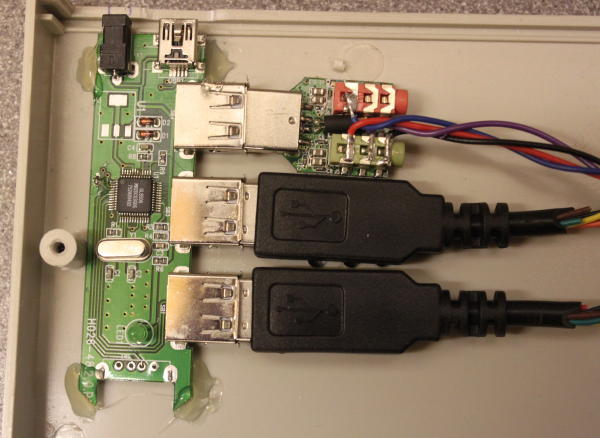
The whole was assembled and tested in a single day. The main board is quite simple. The box was too small for the potentiometers to solder onto the PCB, and flying leads were needed: if I had more time, I'd probably have used smaller trimmer resistors with a built-in mini knob, but these were all I could get on a Friday near home. The USB components were glued in place with a hot glue gun: I suspect a one way trip!
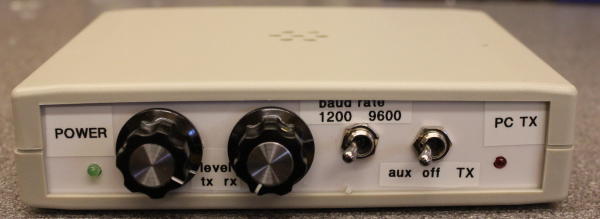
The new interface works well. I was able to generate PSK31 immediately, and WSPR once I'd worked out how to drive it. The interface is USB in, radio out so has far fewer cables than before. This time I'm proud of how much of the volume of the box I've been able to use. It would get smaller still if I put the USB hub, audio codec and serial interfaces as ICs onto a PCB - but that wouldn't have been completed in a weekend.
Configuring the PC software
In my laptop, the com porst appear as COM5 and COM6 (other PCs will give different port assignments).
- COM6 is the CAT data port, and functions up to 9600 baud
- COM5 isn't used for datas, but its RTS when asserted operates the PTT line.
- The TX audio is "VIA USB speaker"
- The receive audio is "VIA USB microphone"
Ideally I'd like to find a way to disable the windows level controls, but haven't worked that out yet!